Problems with the Solar House and Garden
|
The STEM Marin class of 2018 was tasked with providing additions to the Passive Solar House . The problems at hand were that the garden club at San Marin needed a way to keep their plants warm in cold weather and that there was little light coming into the north-facing window of the house. To understand what needed to be done, we needed to understand the concepts of what was happening first.
For this project I worked with Jordan, Jack, and Beau |
Physics Concepts
- Pressure: Amount of force in a given area
- Temperature: How hot or cold something is. Measured in degrees Fahrenheit, Celsius, or Kelvin
- Heat: Amount of thermal energy in something. Measured in calories or Joules
- Specific Heat Capacity: How much energy a substance can hold. Measured in calories per grams times degrees Celsius. For example, water has a high specific heat capacity because it can maintain temperature very well.
- Conduction: The transfer of heat through solids. An example being a pan on a stove
- Convection: The transfer of heat through fluid.
- Radiation: The transfer of heat through waves, particles, or rays.
- Insulation: Resistance to transferring heat; the opposite of conduction.
- Thermal Conductivity: The rate at which a material transfers heat.
Our Solar Water Heater
Our class made solar water heaters to grasp the concepts of insulation, conduction, and heat capacity.
|
|
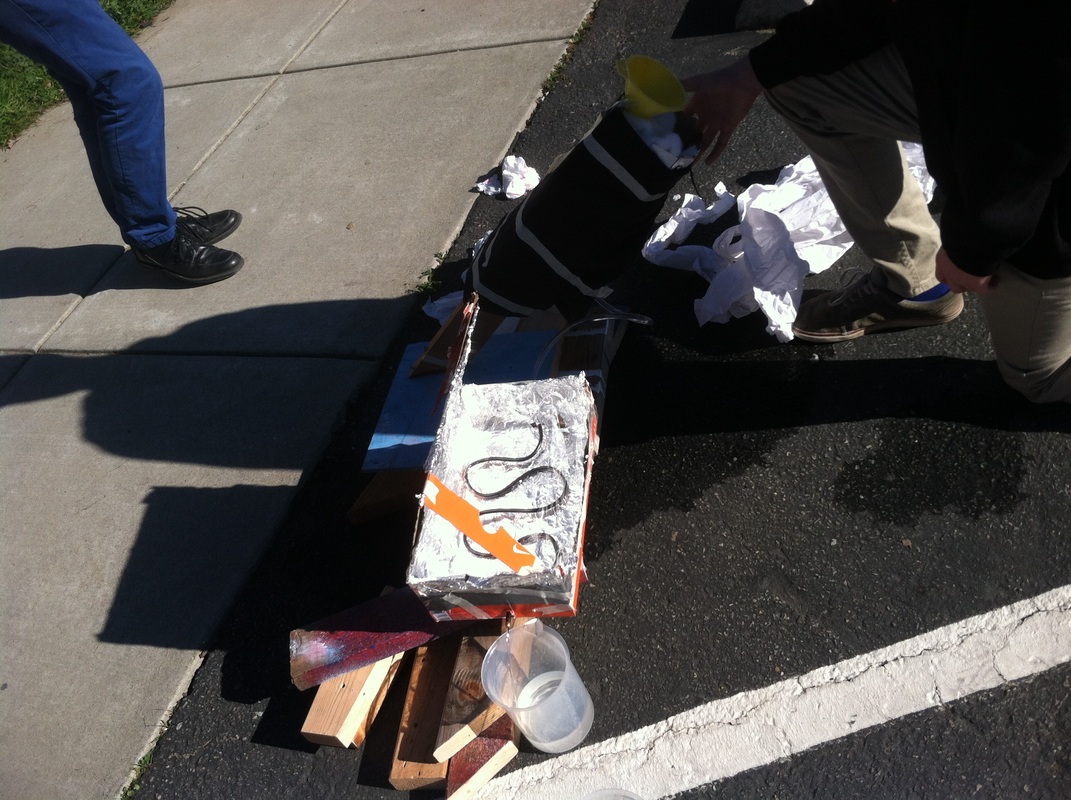
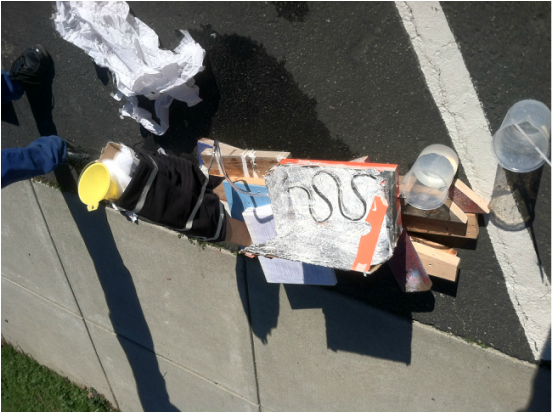
Our water heater featured a water bottle surrounded by newspaper and cotton balls in a box wrapped in a towel for lots of insulation where the water was stored. We wanted to maintain warmth in the storing location so we didn't lose heat while the water sat waiting to advance on its warming route. Once the water was received in the bottle, if traveled through a plastic tube to the black painted copper tube in the shoebox. It's painted black because black absorbs color much better than any other color. On the contrary, whites and bright colors reflect light very well which is why the shoebox is lined with aluminum foil meant to reflect the captured light and heat to the copper pipe with the water. We opened the box at a 62° angle because in the afternoon the sun would be coming in at 28 degrees. So the sunlight would be hitting the plastic wrap, used to trap the sun's radiation, stretched over the opening straight on.
As a class we tested our water heaters together by setting them out in the sun and recording how well it heated up in half an hour. Unfortunately, my groups water heater had a major leak that took us ten minutes to fix so we had only twenty minutes to test ours. Nonetheless, it did well, heating up five degrees Celsius.
As a class we tested our water heaters together by setting them out in the sun and recording how well it heated up in half an hour. Unfortunately, my groups water heater had a major leak that took us ten minutes to fix so we had only twenty minutes to test ours. Nonetheless, it did well, heating up five degrees Celsius.
Daylighting, Designing a House, and Site Selection
To understand how light moves from different angles, we took a flash light and experimented with having it in different locations and degrees. We learned that vertical light (light from right above) is brightest and concentrated therefore it gives more light and heat per unit. Slanted light is less concentrated and spread out over larger a area, giving less light and heat per unit area. Because of this, areas near the equator have more vertical light, thus being warmer and receiving more light, but areas farther from the equator have more slanted light so they're colder.
Having these things in mind, we designed houses to minimize light provided by light bulbs by incorporating things like light tubes, sun roofs, and clerestory windows into our designs.
Having these things in mind, we designed houses to minimize light provided by light bulbs by incorporating things like light tubes, sun roofs, and clerestory windows into our designs.
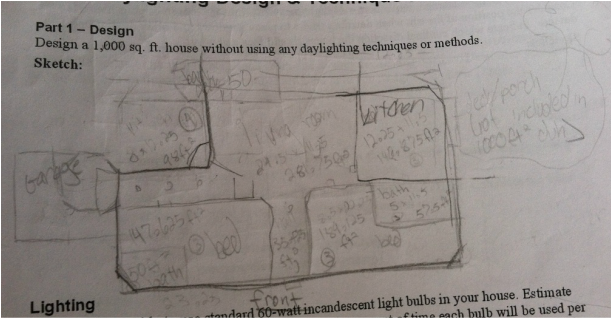
My house design
Quite possibly the most important thing for a house is where it is located. My teammates and I decided that the characteristics of principal importance for our passive solar house's site were the noise, accessibility, and how much light was in that spot. We examined three spots on campus for these three things.
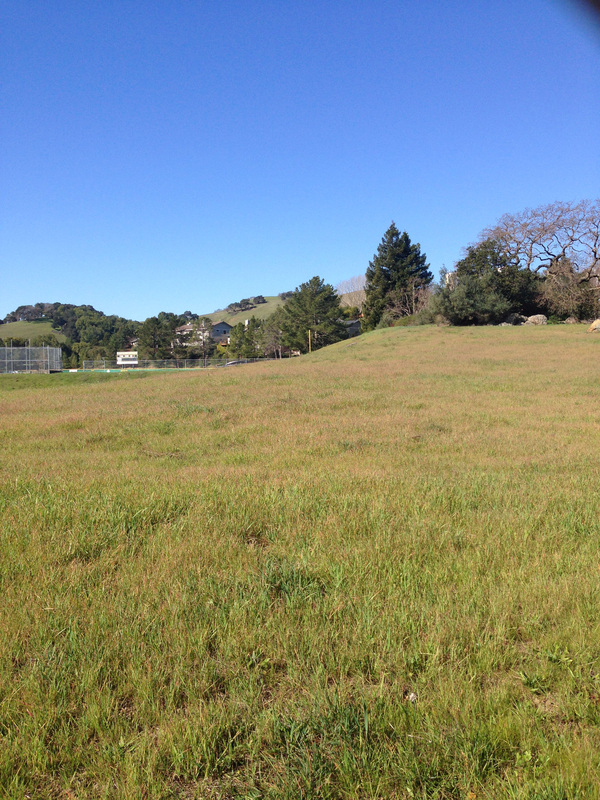
We examined the grassy spot next to the track and football field, the small spot outside our classroom between the library and portables, and up near the baseball field. They each had their own pros and cons, but we decided the site next to the football field was the best choice. It received great sunlight, was easily accessible due to the adjacent parking lot, and only occasionally was noisy because of sports games.
Materials Testing
Before we began creating our solutions, we tested various materials in a lab to find which of them absorb, insulate, conduct, and reflect heat best. Each group was given a category (like paint, wood, metals, etc.) to set under an incandescent light bulb to see how they heated up over a span of 16 minutes and a cool down of another 16 minutes. Unfortunately, our lab was conducted in an uncontrolled environment so we had to scrap all of our data. It was a waste of time.
The Coldframe and Reflectors
|
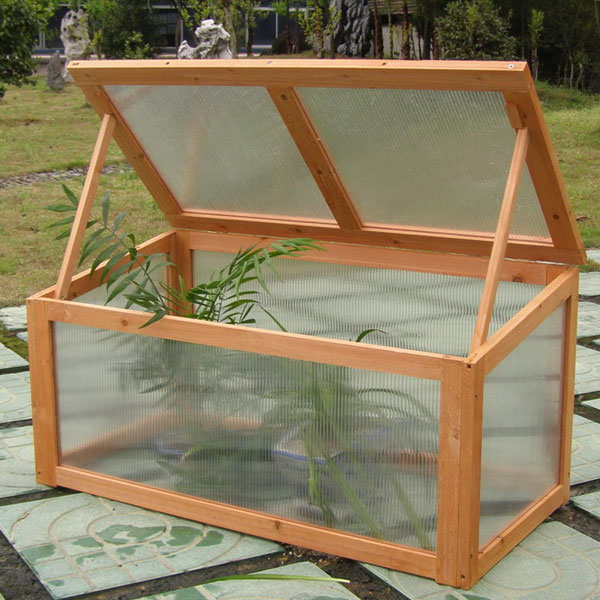
To solve the problem of chilly plants, each group designed a unique coldframe. A coldframe is somewhat of a miniature greenhouse. It's a plant bed made to keep plants warm without the aid of electricity. It's very simple and utilizes solar energy and insulation. To the left is an example of a very nicely built coldframe.
|
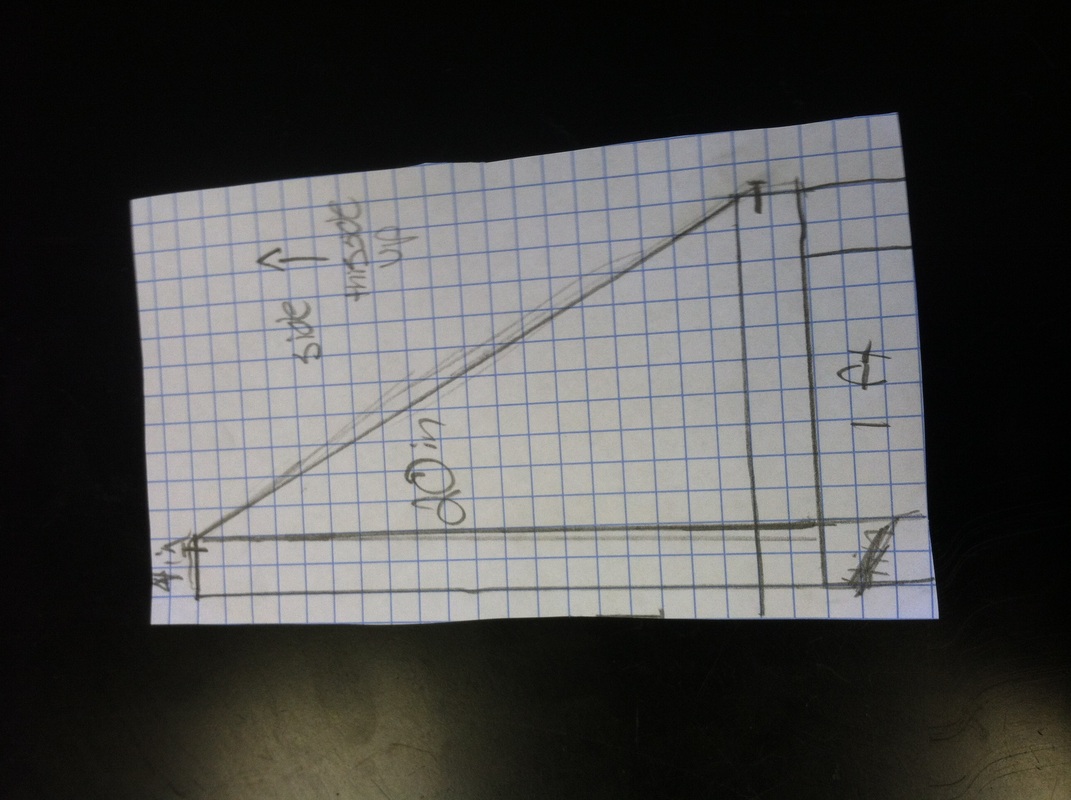
Our coldframe is triangular, open-bottomed, and made of pressure treated 2x4's. Here you can see the Prezi we created to aid our presentation on the coldframe

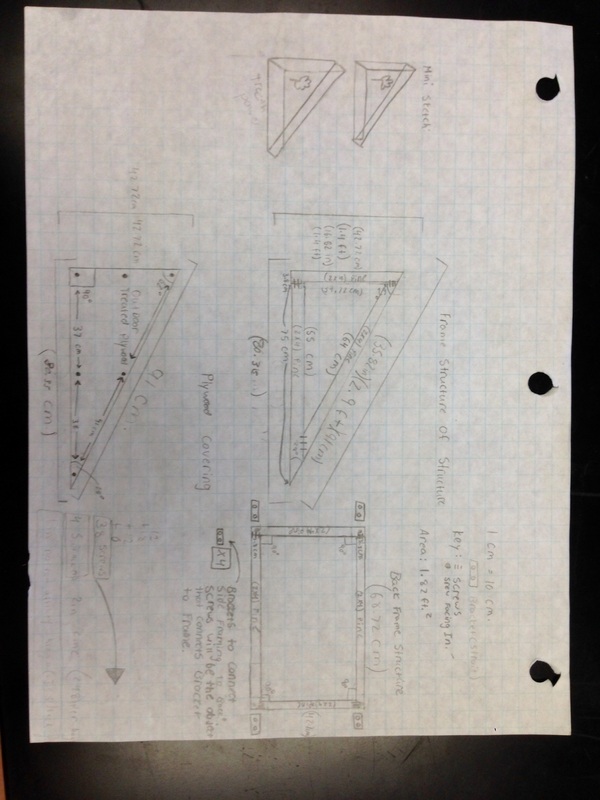
We decided to paint the interior of our coldframe yellow and the exterior green. Not only is it festive for San Marin spirit, but it is most useful for reflecting light within the coldframe and absorbing light into the coldrame.
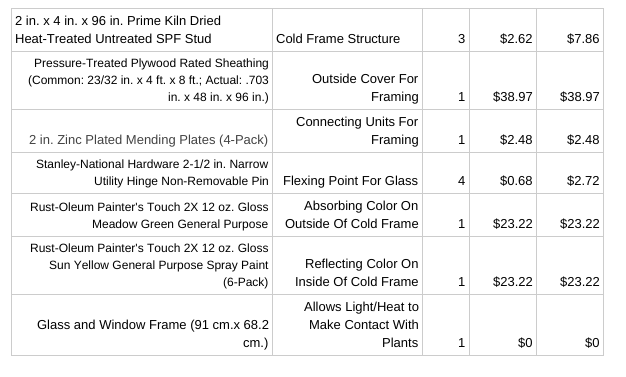
Above is our materials for the coldframe. It only costs $98.47
The Reflector
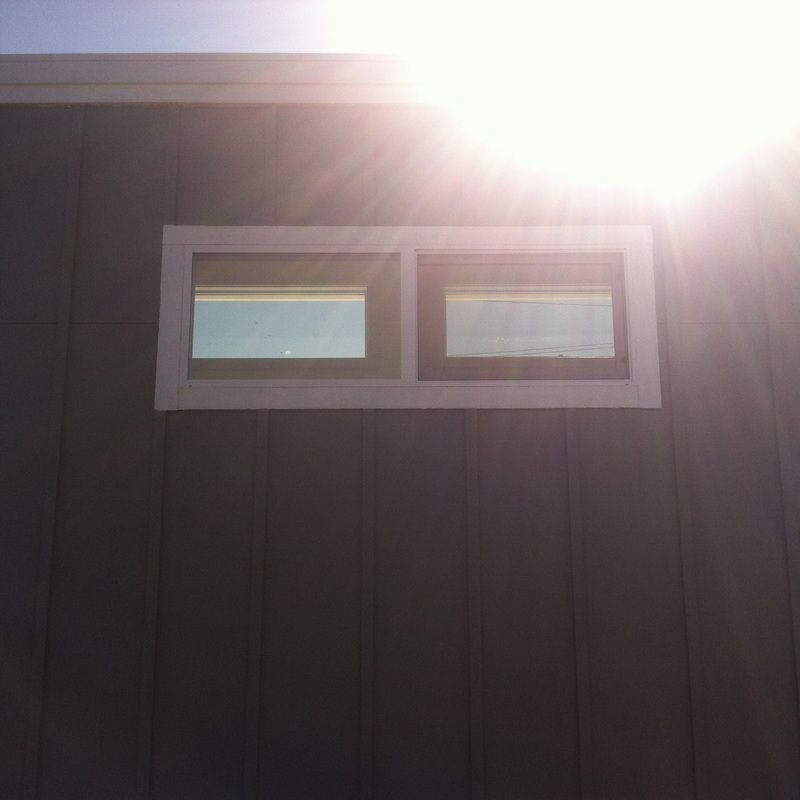
There was no light or heat coming in from the north window of the house. Since the last solution to that problem was stolen, Mr. Williams and Ms. Havel tasked this years STEM Marin freshman class with making new solutions. My group thought a reflector served the best purpose for the problem at hand.
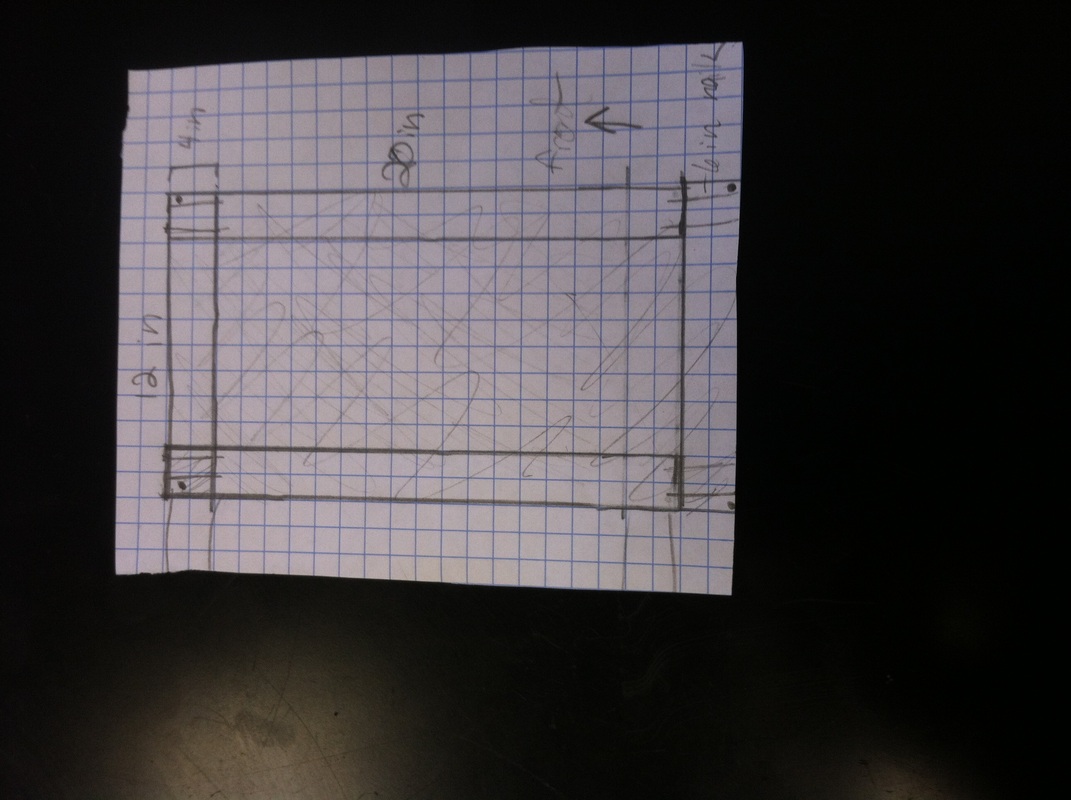
Our final design for the reflector was 6 feet tall on four 4x4 piece of wood. It was an aluminum sheet spread over a frame made of pressure-treated timber. You can see the Prezi we made for it here.
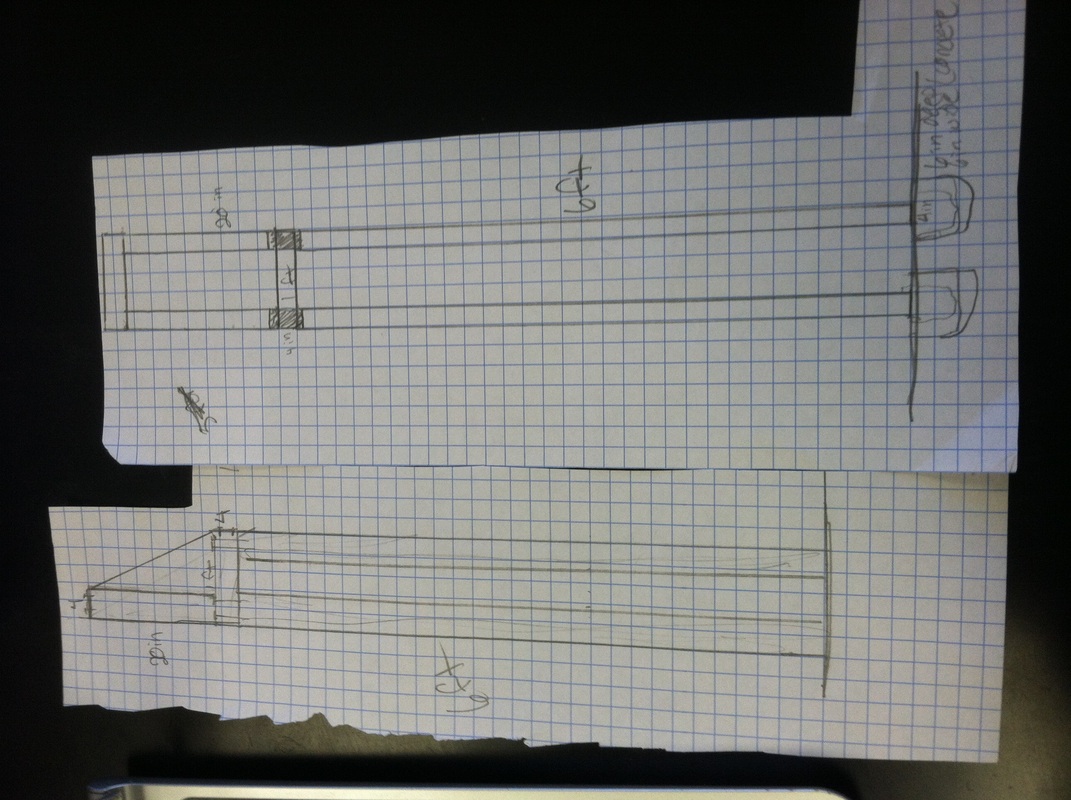
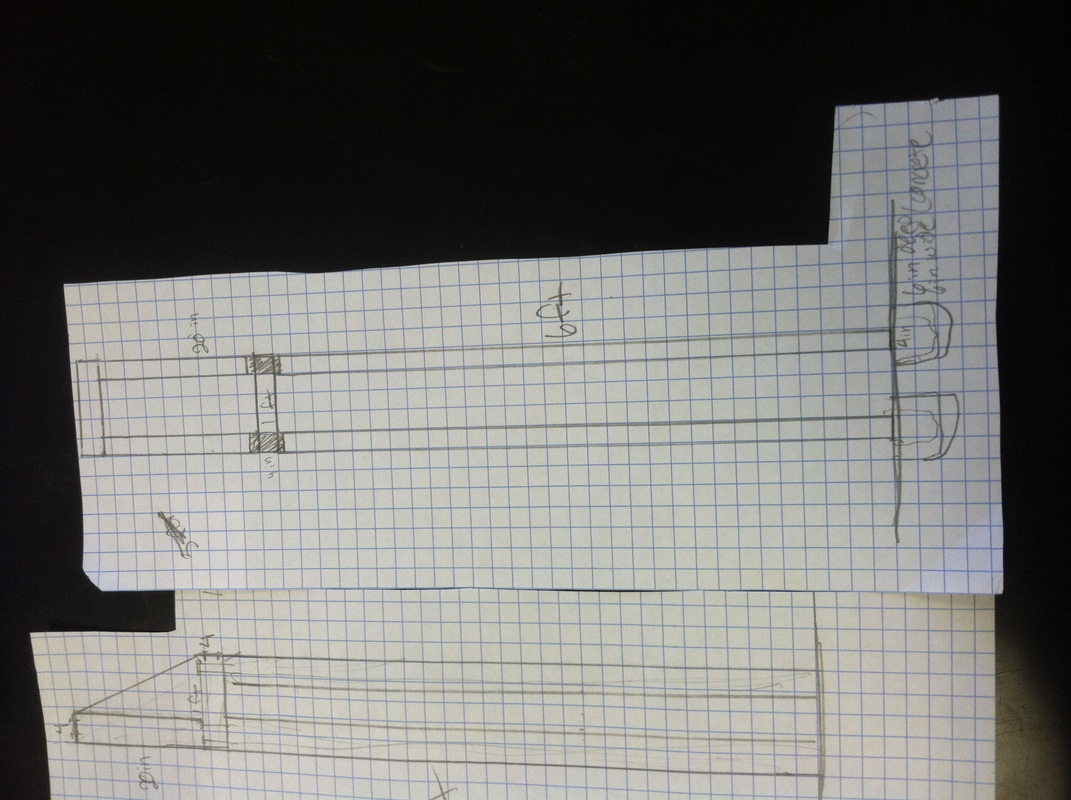

Originally we planned on having a photography reflector but decided on a aluminum sheet since it was much more durable to be outside. We planned on having two reflectors facing towards the window, so as the sun moves then the most light and heat would be coming in at all times.
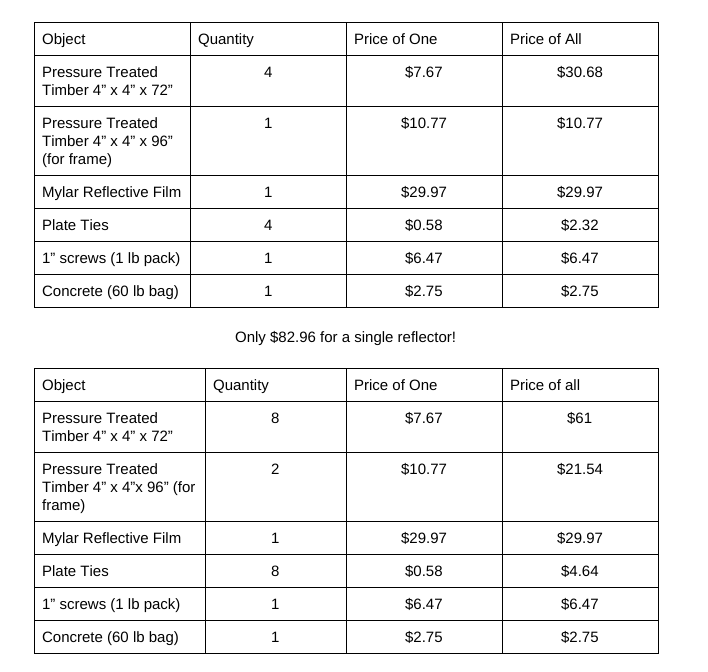
It's only $82.96 for one reflector and $126.37 for both.
Reflections
This was a very long project. It was hard to work with the same group for two months. I feel like we should have separated this project into two parts: one where we learn about physics and did the labs and a second part where we designed the reflectors/coldframes. I also feel like we could've organized our work much better than we did, and give people tasks according to their strengths and what other people were doing. Nontheless, I enjoyed learning about the physics concepts, and it was an interesting project.
