Alu PV92 PCR
For this lab I worked with Sterling, Brian, Nick, and Ethan. We conducted this lab to learn if our alu genes were heterozygous or homozygous. What does this mean? More below.
"Most genes in the human organism are themselves broken into smaller protein-encoding segments called exons, which, in many cases, have hundreds or thousands of base pairs intervening between them. These intervening regions are called introns and they make up between 90–97% of the entire genome. Since these non-coding areas such as introns have no defined role, they were referred to as "Junk DNA". Whatever their function may entail in the genome, closer examination of these intervening DNA regions has revealed the presence of unique genetic elements that are found in a number of different locations. One of the first such repeating elements identified was Alu."
That's an excerpt from the lab guide for this experiment. I figured it defines Alu well enough. The Alu Gene is known as "the jumping gene." It copies itself and puts those copies into a new chromosome location. To do this, Alu will transcribe into messenger RNA. From there it's converted to a DNA molecule then is incorporated into a new location where there is a break. Alu locus (gene) can be used to trace the movement of your ancestors and the human race. Alu can be heterozygous, homozygous positive, or homozygous negative.
You can see the procedure of the lab in PDF form here. Since barely anyone will bother to click that link, I paraphrased below
Procedure |
Materials |
|
1. Swirl 10 mL saline solution in your mouth for 30 seconds
2. Spit it into a cup 3. Label 1.5 mL tube with you initials 4. Transfer 1000-1500 micro liters of the saline and spit into your initialed tube 5. In the microcentrifuge, spin your spit and saline for 1 minute 6. There will be a pellet at the bottom of the tube. This is your cells. Observe it. Recklessly pour your solution into a cup and oray that the pellet stays in the tube 7. Observe your pellet. There should still be 100 micro liters of spit and salt water in the tube. Flick the tube. Flick it. 8. Get some Chelex. Not drugs. Chelex. They look like tiny balls 9. Withdraw 50 micro liters of your spit pellet and saline and put it in the Chelex (not drugs) 10. If your Chelex balls and spit pellet is in a normal 1.5 mL tube then put on a cap lock and put it in the heat block. If it's not normal then you lose. 11. Remove the cap lock, open the tube because there's pressure pushing down on it, pressing down on you, no man ask for. Close the lid and shake it. The contents support segregation, so the shaking will forcefully make them accept integration among the elements within the tube. 12. Get one more tube. Label it with your initials and then DNA. If you don't initial it, it will feel left out 13. Use a micropipet to withdraw 50 micro liters of supernatant from the Chelex (not drugs) tube to the new tube. Don't transfer any Chelex (not drugs) 14. Make sure there's no Chelex. There should be no Chelex beads at all, as they interfere with the PCR. 15. Put your DNA tube into the class rack. The others in your class will do the same thing. It's good for the tube to meet others of its kind. NEXT SET OF STEPS 1. Get another tube. Initial it. 2. Pipet 20 micro liters of Master (mystery) Mix into the new tube. 3. Add 20 micro liters of Primer Mix into the same tube. 4. Add 10 micro liters of your DNA (from the last 15 steps. Remember those?) to the tube filled with primer and mystery mix. Total volume should be 5 0 m i croliters 5. COmpare your tube to a standard tube. Have fun repeating these 20 steps if you messed up 6. Place you tube into a thermal cycler and record its location. 7. Heat it and stuff. NEXT STEPS 1. Get your tube later and put it in a microcentrifuge 2. add 5 micro liters of dye into the tube. Des colores. 3. Load 15 micro liters of your colorful DNA into a well in the Agarose Gel you established earlier (you're not doing this as you read it, you don't need those steps) 4. Attach the box to a power supply. In short time, you should be able to see the stains to trace your zygous. |
- PCR tubes
- 0.9% saline solution - Micropipettes, tips - waste container - microcentrifuge - microcentrifuge tubes - agarose - 1XTAE - food dye - gel chambers and a mold - chelex - primer mix - tube racks |
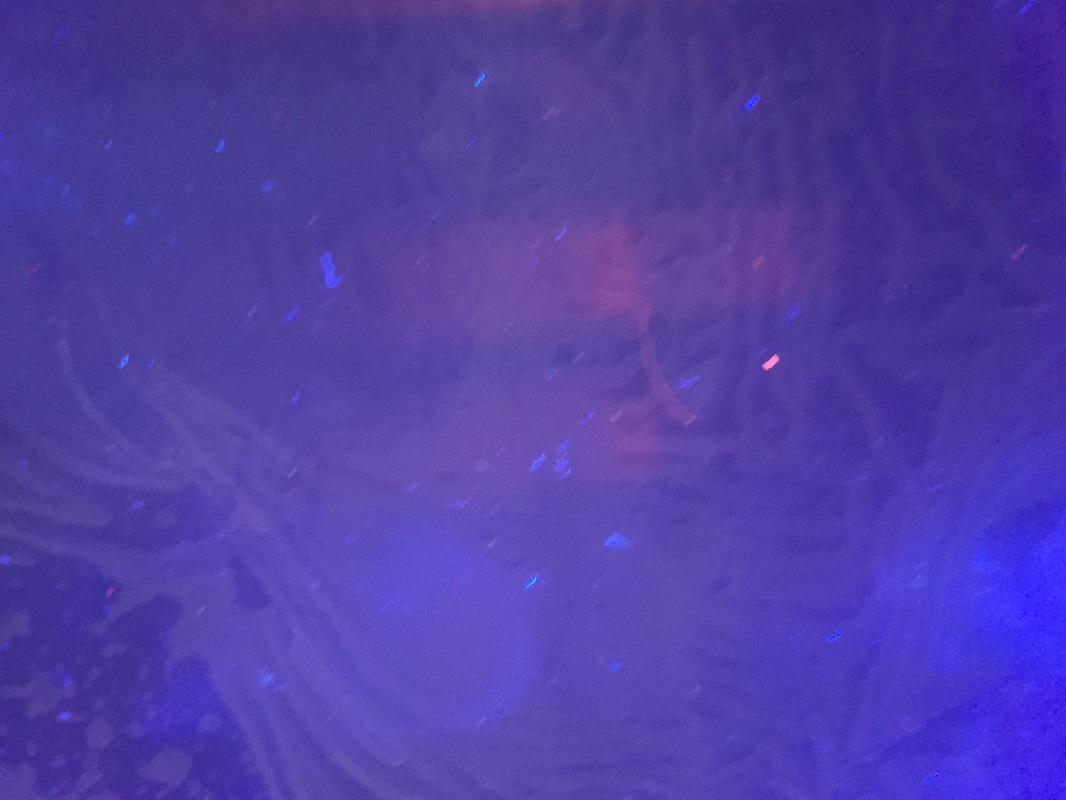
Results of First Time
|
As you can clearly see, there are orange and blue lines within the purple/indigo goo. Within these lines there are bands at the 400 and 700 marks. If you have a thick line at 700 then your alu is homozygous negative and if the band is at 400 then your alu is homozygous positive. If you have bands at both 400 and 700, then your alu is heterozygous. Initially, my alu was not visible so my genotype was left undetermined.
|
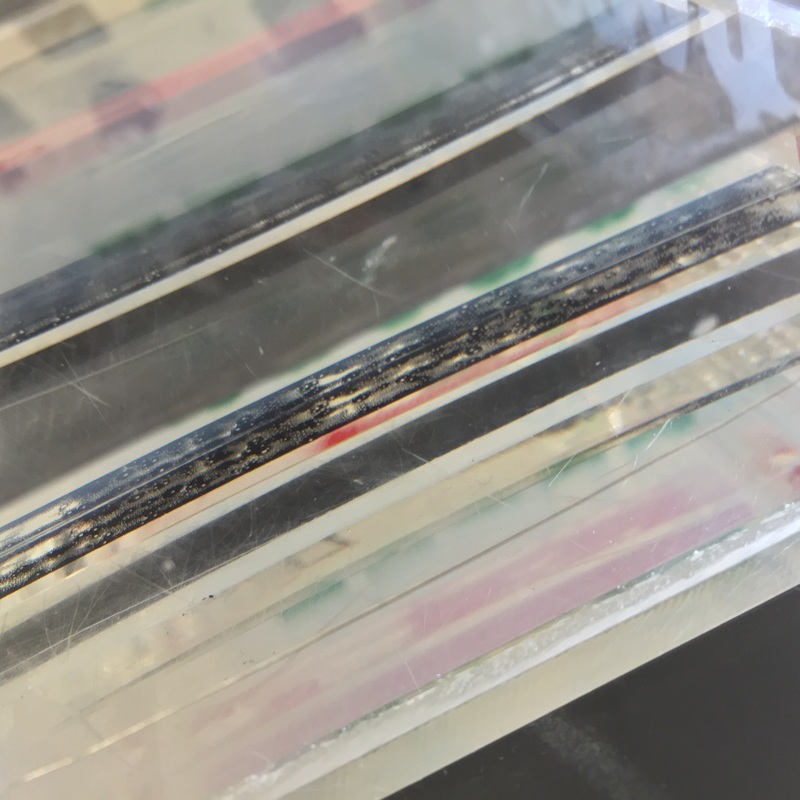
Results of second time

|
Upon running the experiment again (correctly this time) I discovered my alu is homozygous negative. You can see my results on the far left, the only defined line.
|
For our first lab of the year, there was a lot of error. When prepping the dish where the gel would go, my teammate did not properly secure it to ensure there would be no leaking. We had a leak. That made us lose most of our solution so we had to combine the remaining part of ours with another group's that wasn't prepared properly. There is also a possibility that I pipetted my DNA into the gap in the gel incorrectly. All these factors led to me not getting conclusive data. In the end, I discovered my true alu. I can't imagine life without this information.
